Optimizely DXP Deployment API – Provisioning new environments

As I continue to use the Deployment API, I always am looking for new and exciting ways to use the commands. In this case, being able to provision a brand new set of DXP Environments for a client.
In this post, we will go through the following:
- What environments exist in DXP?
- Why do we provision these early?
- How to provision the environments (script)
- Conclusion
What environments exist in DXP?
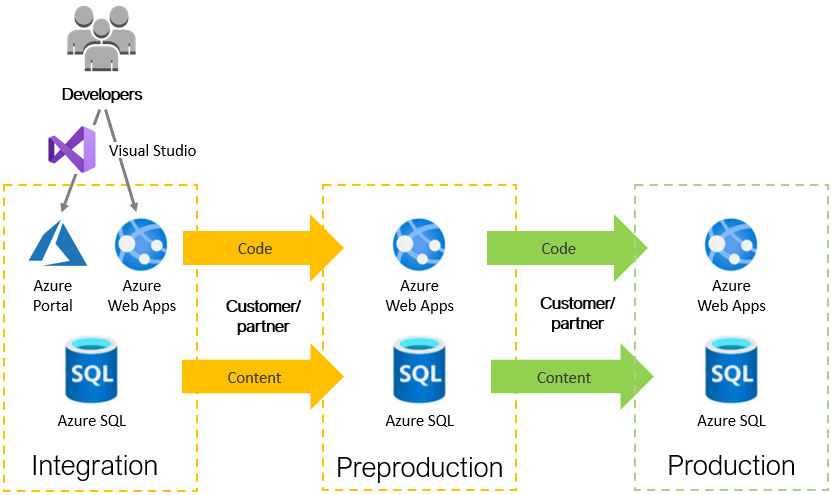
The Optimizely DXP is made up of three environments; Integration, Preproduction, and Production.
Which environments need to be provisioned?
When a new customer is onboarded onto DXP, Optimizely creates the Integration environment. This will allow the developers to start publishing their code to the environment whenever they need to.
At this point, the Preproduction and Production environments are not actually set up within Azure yet. These are the two environments that always need to be provisioned in a new DXP setup.
These two environments are created in an automated process when code is published to them for the first time, usually through the PAAS Portal.
Benefits of provisioning these environments early
There are a couple reasons that I recommend provisioning these upper environments sooner than later:
-
Custom Domains – This is the biggest reason! When working with your DXP environments, it is always nicer to have your own domain names. That being said, the process isn’t the easiest for the client.
It’s easier to be able to do this in one big request, since this isn’t the most straightforward process.
- Ticket is created asking for custom domains
- Opti gives verification DNS (txt records)
- Customer has their IT department apply DNS
- Customer lets Opti know it is done
- Opti gives final live DNS (cname records)
- Customer has their IT department apply DNS
-
Permissions to Azure Environments via Tickets – When asking for certain permissions, such as Azure resources, they can only be given if they are created. (Duh)
Part of the “Power User” permissions (developers) include being able to access the “Application Insights” data for Preproduction and Production. If these environments aren’t created in the beginning, new tickets would have to be opened to Opti support for each developer via the Azure Access Form once they get provisioned.
How to provision environments
As mentioned above, the default way to provision these environments is to just push your code to them via the PAAS portal or the Deployment API.
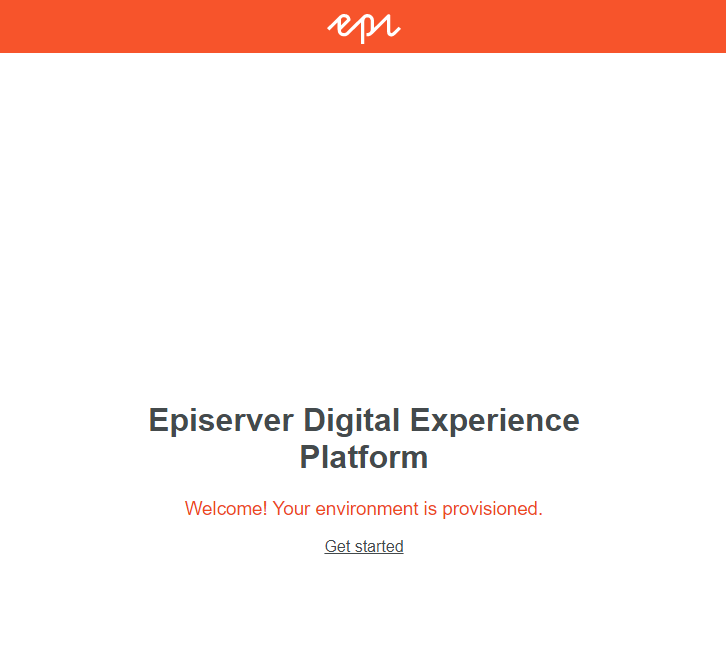
What I have done is combined three of my existing scripts to be able to provision the environment without actually pushing any code into the “live” slot. This means that the default “Welcome…!” screen will still be shown on the environment.
This also does not count as a deployment into production, so you can still publish a database from preproduction on your first real publish.
As of today, I have released a new script onto my github, called “ProvisionEpiEnvironment.ps1”
The invocation of the script is as follows
.ProvisionEpiEnvironment.ps1  -ClientKey "****"
                              -ClientSecret "****"
                              -ProjectId "****"
                              -TargetEnvironment "PreProduction"
The switch that is also included but missing from the above code block is “-ArtifactPath”, which is defaulted to use a code package that I have created. It is located in the “epicloud-scripts/Scripts/Packages/” folder.
As described in my Series Part 3 post, when you generate a code package, it is zipped as a .nupkg with your website code in the wwwroot folder.
What I have done is taken a similar concept and have prepackaged and provided a file called “ProvisionEnvironment.cms.app.1.nupkg,” which is just 2 files zipped up inside of a wwwroot folder:
- Web.config – The deployment API is looking for a web.config to ALWAYS exist, or you will get an error (although, the environment will still provision…but I did not feel right leaving a provisioned environment with an error)
- Default.aspx – I took the ASPX “Welcome…!” page that is always on brand-new provisioned environments, so that if this ever does get published anciently, its something friendly.
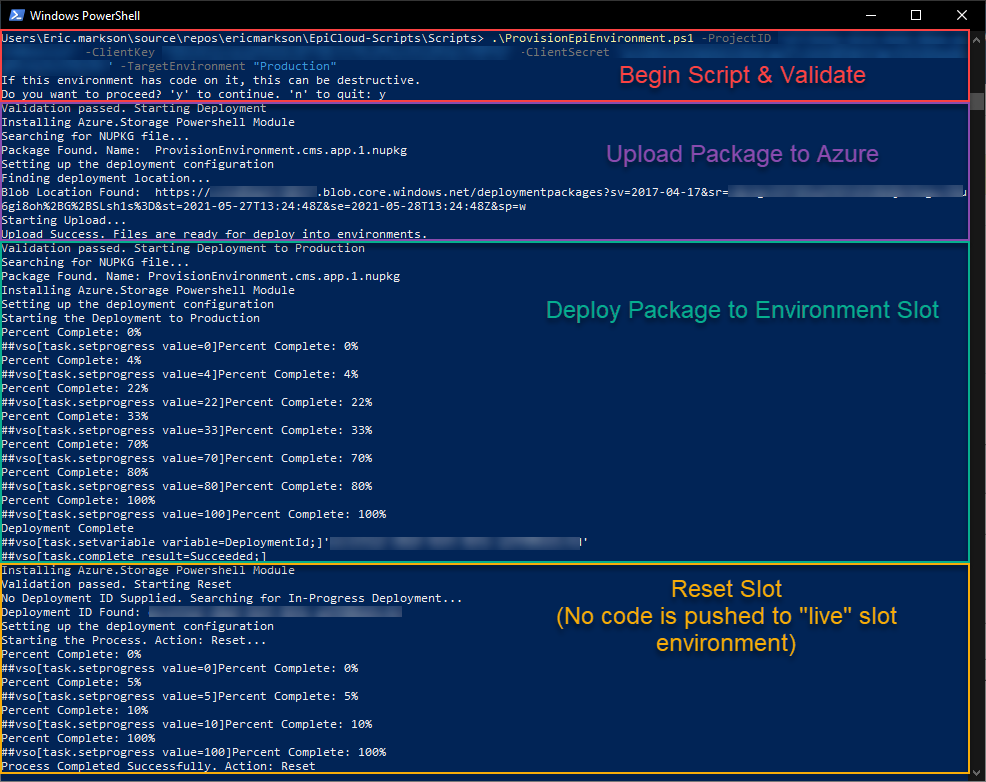
Once the script is started with the above invocation, you should see the below happen:
After you start the script, if you go into the PAAS portal, you should see whichever environment that you are provisioning show a message similar to this
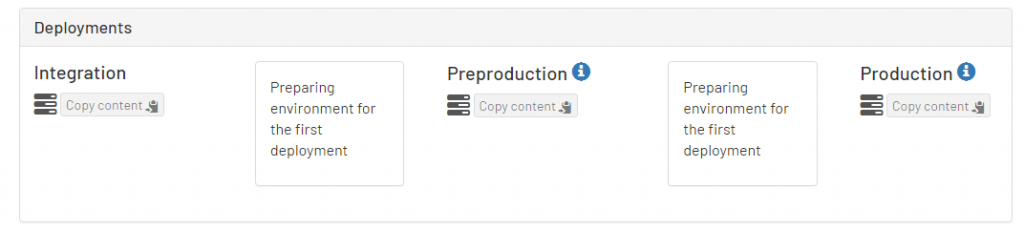
Once the script is done, you should see this line in the “Recent Deployments” table in the PAAS Portal

Conclusion
This concept is something that is brand new and I just used for the first time today, but it solves a problem that I have had for a while.
I always seem to end up deploying broken or unfinished code into the upper environments, which seems dirty. I have also had some clients just wait until near the end, but then they always scramble to get the DNS entries created with their IT departments.
As far as I’ve seen, from my side of the fence, the pros outweigh the cons to provision these environments as early as possible as to have one less thing to worry about.
As always, please let me know if you have any comments/questions/concerns. I am more than happy to help!